|
MGB Differential Clunk Removal June 18, 2011 - Naperville, IL 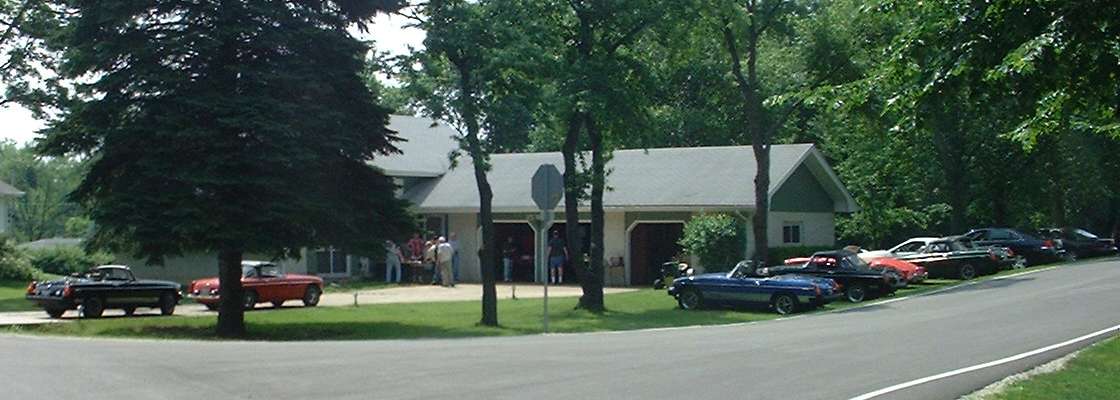 A nice place to work, near the tollway and and plenty of off-street parking.
This tech session was a little different from the one eight years earlier, like working on eight cars in one day rather than just one. We could have called it Proctology Day. The idea was to surgically remove the clunk from the rear end of as many MGBs as might show up for the service. On prior reservations we ordered thrust washers, gaskets, seals and gear oil for six cars on Monday, a seventh car had his own parts in advance. Parts arrived on Thursday, gear oil was picked up early Saturday morning (along with coffee, donuts, soda and ice). One more MGB arrived for service on a wish that there might be enough parts left over to do him too. We also had one MGC rear axle (with 3.07:1 gear ratio) that was carried in for the same service. That one took first turn at the bench on the patio while three MGB occupied the garage for the first round. Jack stands for everyone. 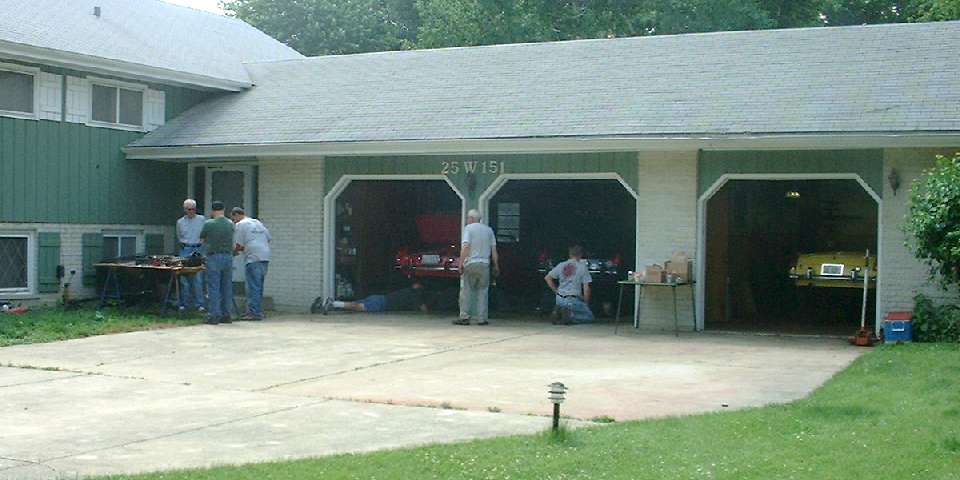
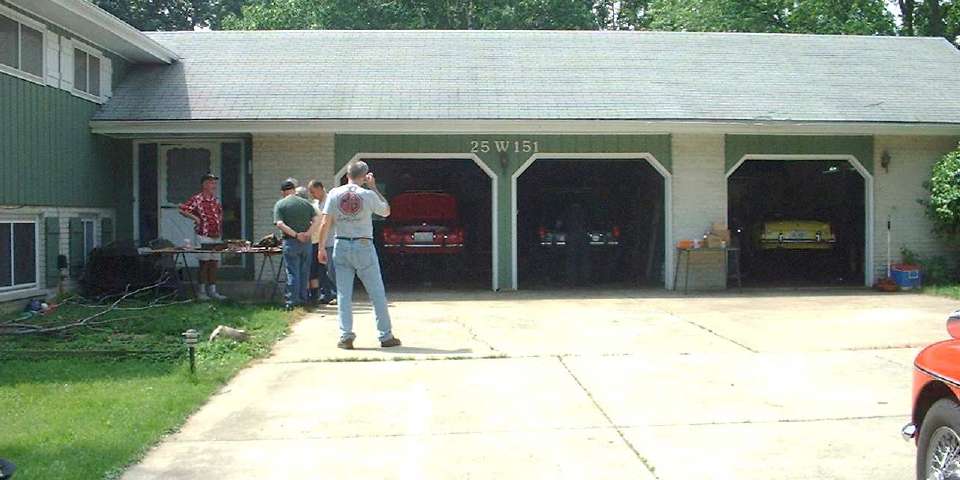 Today we have three service bays and a work bench in the shade on the patio. Ah, truly shade tree mechanics at heart. If I counted right, we had 10 visiting cars and 13 people before day's end. With this many hands available the work would clip right along. 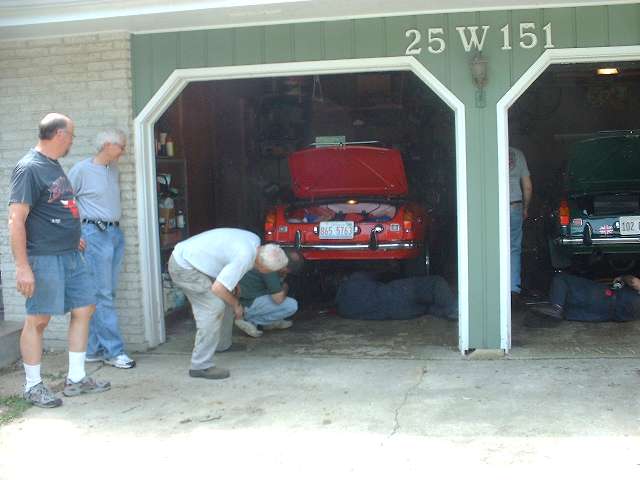
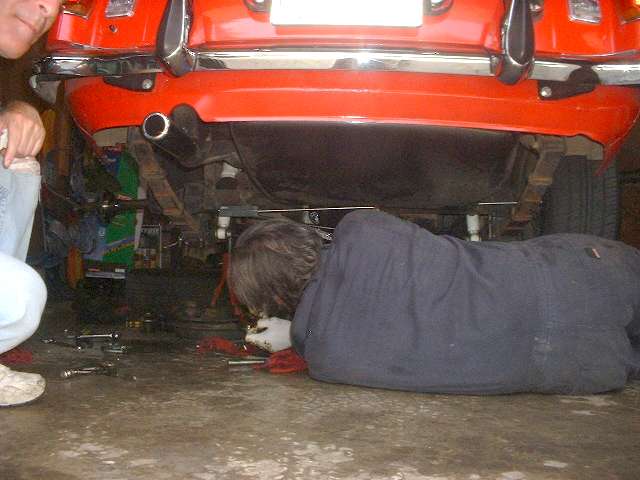
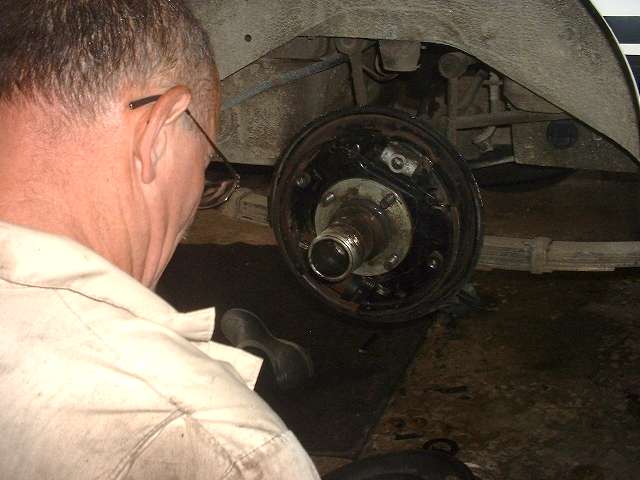
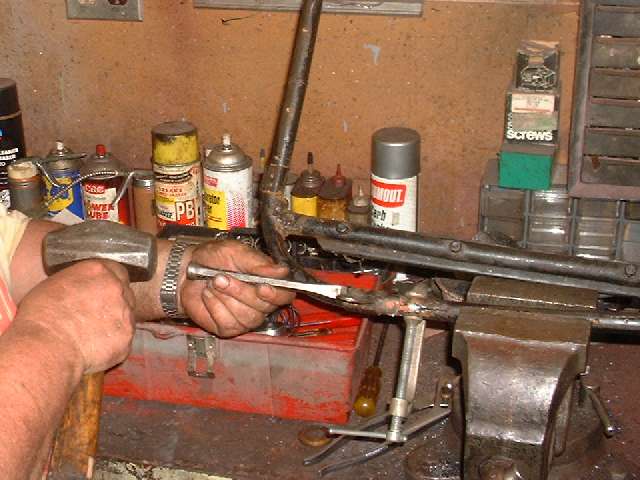
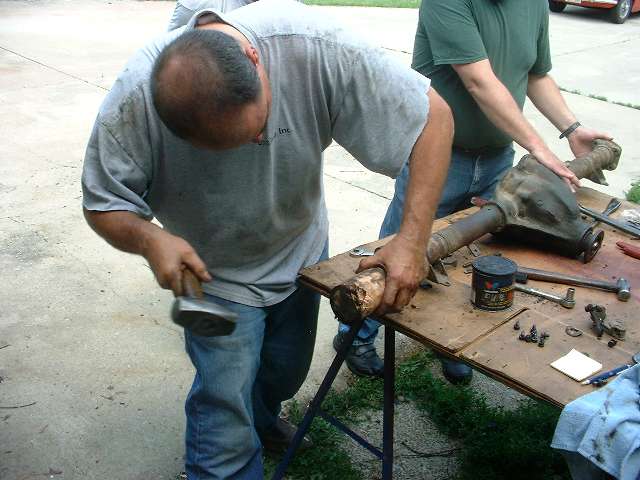 The high lift floor jack and jack stands started right to left, yellow B with wire wheels, green B with wire wheels, and the red B with tube shocks, while the MGC rear axle set up shop on the bench on the patio. The yellow car was bogging down with a problem removing a cotter pin, and then the splined hub was stuck on the half shaft and resisting even the five pound sliding slammer hammer. Big boy tools were flying all over the place, impact wrench and air ratchet on the end of the 50 foot air hose. The green and red cars popped the hub off of the half shaft quickly with a pair of pry bars, and the race was on. The C axle had a head start, having skipped the jacking and tire removal stages, but I didn't quite catch what Bob Brownlow was doing with the big wood punch and two pound hammer. Once the oil is drained and rear cover is removed, the red and green cars and the C axle all required ViceGrips and the slide hammer to extract the pinion shaft from the differential, much to my surprise. Otherwise the rest of the work was progressing nicely. With one half shaft out and pinion shaft removed, the planet gears orbit a bit and literally fall out in your hands. Slide one sun gear over to be removed along with the flat thrust washer (if the worn thrust washer is even still present), then slide the second sun gear off of the remaining half shaft splines. Good time to clean out the Axle housing, and then "reassembly is the reverse of disassembly". The only trick is getting the two planet gears installed exactly 180 degrees across from each so the bores align to accept the pinion shaft. 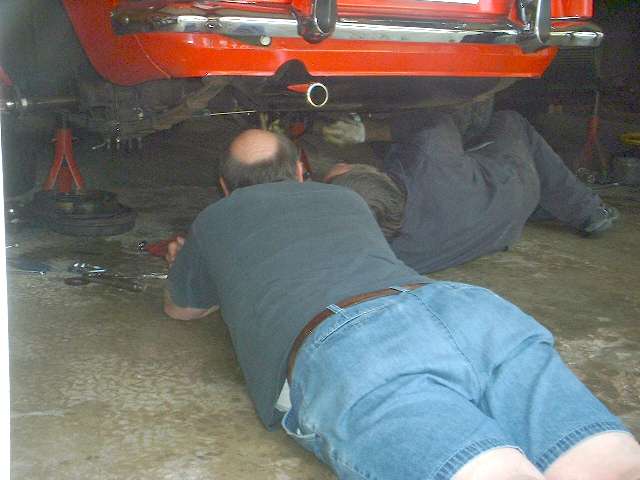
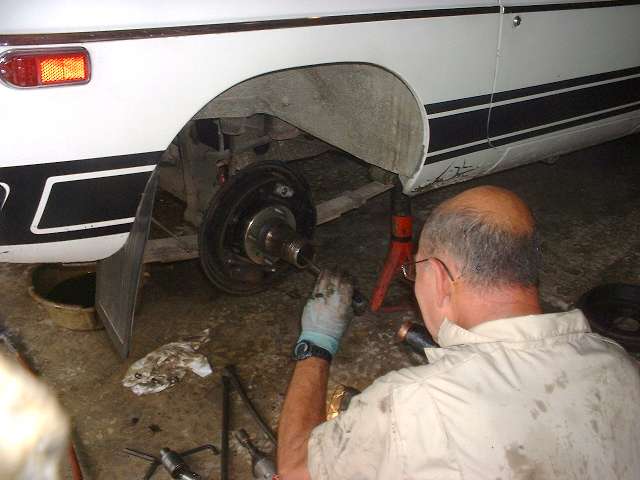
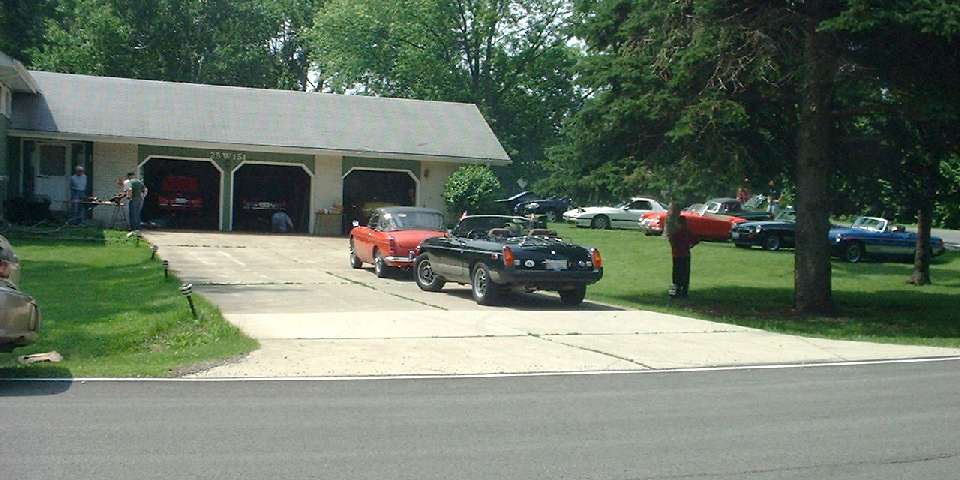
 Assemble side gears with flat thrust washers, then planet gears with spherical thrust washers, the pinion shaft and the roll pin to lock the pinion shaft in place. Glue a new gasket to the rear cover and screw it in place, change one oil seal and reinstall the half shaft, brake drum and wheel. Fill the housing with one quart of EP80W90 gear lube, jack to remove the stands, and it's time for the "super bowl shuffle". The red car was out just about the same time that the C axle moved from the bench to the cargo bay of the sport ute. The yellow car succumbed to splined hub removal frustration, reinstalled big nut, split pin, brake drum and wheel, and vowed to try again another day. Bummer. It's not very often that we fail at disassembly. Taking things apart is usually the easy move. Now three cars are out and the bays are available for the next round. John Kearns has been patiently biding his time with his black B under a shade tree, doing some fiddling with speaker grilles on the inner door panels. When a service bay is available he checks the time and notes that he has a business appointment in mid afternoon, so now is not a good time to disasseemble his rear end. He had originally planned on being first in early morning, but a few other cars had the same idea and seized the opportunity ahead of him. Okay, one more car off the list and needing to re-schedule for another time. So the white car moves into the left bay, and Victor can get his '67 B into the right bay. Hydraulic jack, jack stands and air tools are flying around again. The white B is another wire wheel car. The cotter pin comes out okay, and the big nut is off in a flash with the air gun, but then his splined hub is also stuck on the shaft. Not being the type to discourage easily, the owner is persistent. We finally disassemble the brake shoes and springs and links to allow more room to maneuver the tire irons, after which enough leverage prevails and the splined hub ultimately lets loose with a startling bang. It all comes down to the split bevel washer that likes to stick on the shaft. 

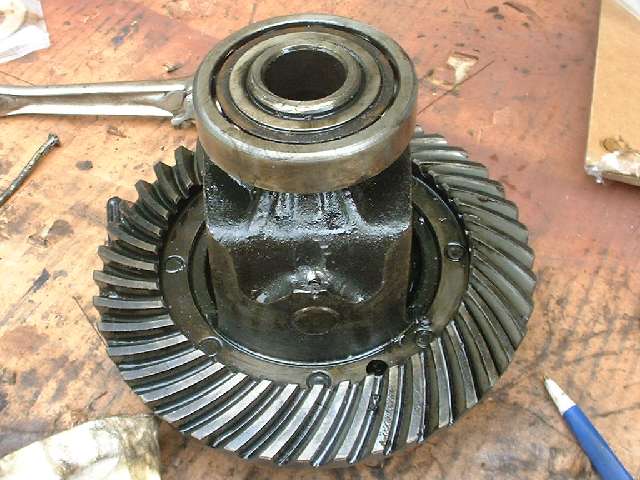
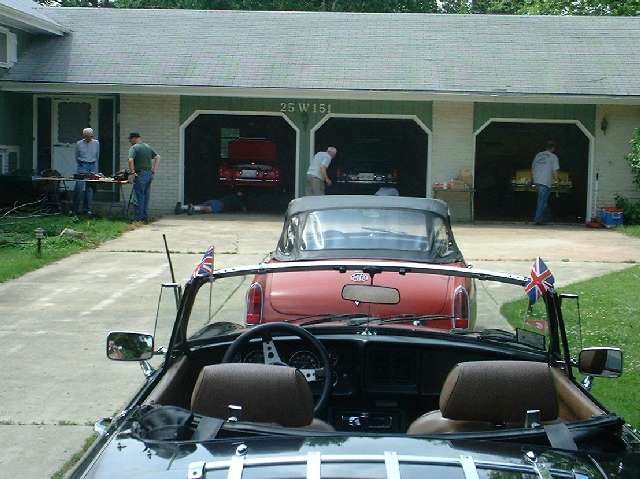
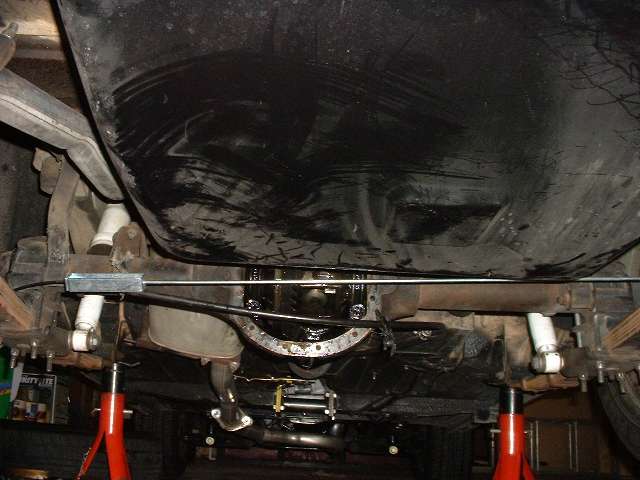
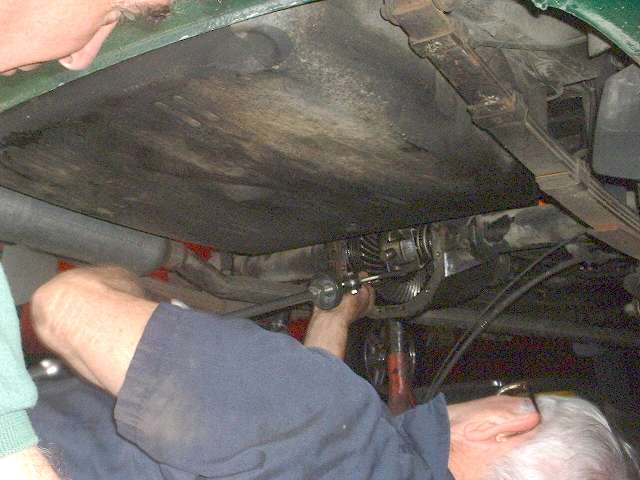
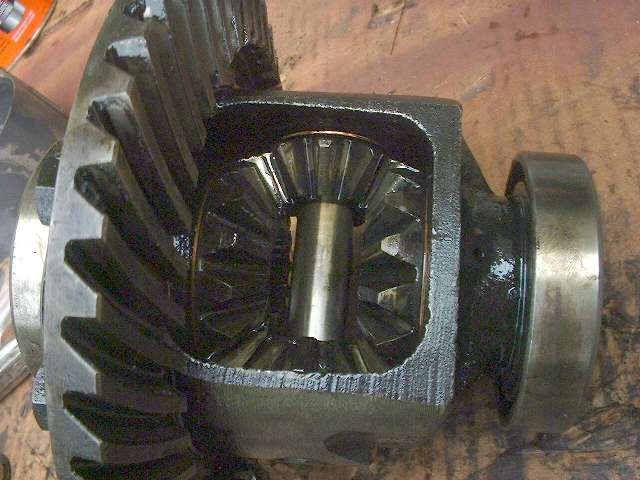 Meanwhile Victor has been making good time with his 67. This one needs to have both half shafts removed and the propshaft disconnected so the entire differential "pumpkin" assembly can be pulled out the front. Even though there are more parts to remove, the parts mostly come apart easy enough, and the pumpkin is on the bench by the time the white car's splined hub went bang. Remove four large nuts and two main bearing caps, and the ring gear and differential assembly slips easily out of the cradle. This one has a solid steel pin to secure the pinion shaft, and the small carrier hole is peened over a bit to retain the pin. On minute with a 3/16 inch drill bit cleans out the peened end of the hole, the steel pin pops right out, and the pinion shaft can be easily driven out promptly from one side. Changing the thrust washers and reassembling the bevel gears only takes a few minutes. While Victor is cleaning his parts I lend a hand under the white car to change the thrust washers. This one behaves like a mild tempered child, and the pinion shaft literally pulls out with finger force. What a pleasant surprise after earlier frustration with the other cars. In a matter of minutes the thrust washers are replaced and the pinion shaft is installed and secured. A few minutes more with Victor to install main bearing caps and torque the nuts, and he is off to reinstall the pumpkin. One paper gasket and ten washers and nuts up front, followed by four bolts in the propshaft flange. Since his hub seals were not leaking, he opts to not remove the bearing hubs, and reinstall the half shafts in short order with new o-rings, paper gaskets, and one flat head screw in each side. Replace the brake drums with four nuts each, knock on the wire wheels, put a quart and a half of EP80W90 in the housing and remove the jack stands. White car is done with the differential but is still reassembling brake parts while Victor takes one lap for a test drive. Photo at left below shows the two most used tools of the day (after the slide hammer perhaps). The special taper ground socket wrench adapter makes a simple wrench for drain and fill plugs in MG gearboxes and rear axles. The other twisted piece is a long #10 screw that has served all day as a pin punch for drifting roll pins out of the differential carriers, and also doubling as a cross pin when using the slide hammer to pull out pinion shafts. That was a lot of service for a fifteen cent screw. 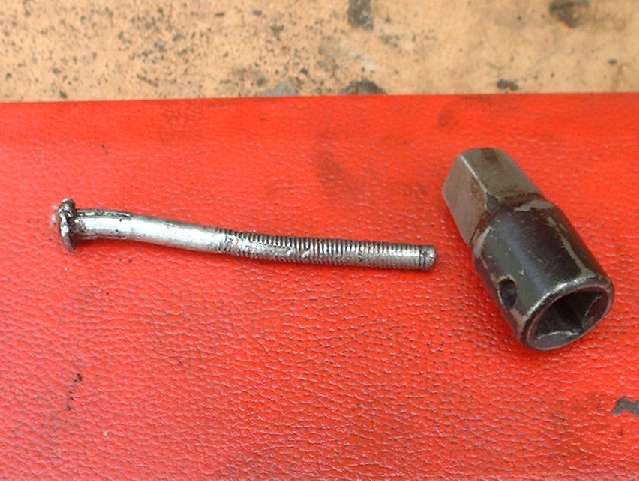

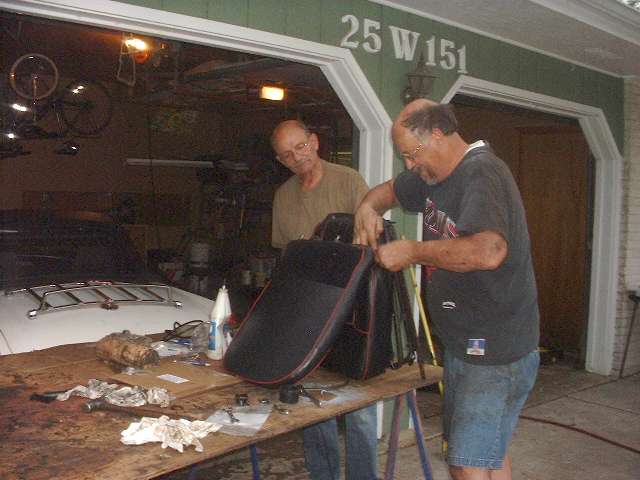 After his test drive Victor had one additional problem for attention. There will always be something different going on at the side during these tech sessions. This time it is a broken tube in the base of the seat frame that needs repair. So back to the big boy air tools to zip out some mounting bolts, then two bolts to separate the backrest from the base, and several minutes to strip the cover and cushion and rubber diaphragm off of the lower tube frame. After just a little head scratching the broken tube is straightened in the vice and made round by hammering in the tapered handle of a socket wrench. Measurement shows 5/8 inch ID for the tube, and it needs some internal reinforcement before welding, so we cut the head off of a long 5/8 inch bolt. Then drill some 1/4 inch holes in the tube for plug welding, split one side of the tube for about an inch at one end only, and open it up to a "U" shape. Tap the bolt half way into the tube on the other side, lay the extended end of the bolt inside of the split tube, and wrap the spit tube around the bolt. After a bit of pinching and clamping to round it all out, the club MIG welder comes out to plug weld the eight holes to the bolt, weld up the prior split line, and weld 360 degrees around the original break joint. This is the forth MG to make use of the MIG welder in less than 30 days. This is followed by grinding of the welds with the pedestal grinder, a 4-inch angle grinder, and finally a high speed die grinder with 2-inch sanding disc. The idea is smooth out the welds so they become invisible, but also that smoothing the metal removes divots and cracks and maybe pin holes in the welds that could be stress risers, and thereby reduce probability of future crack failure. A couple minutes with a rattle can and primer paint, and then back to lending a hand with final assembly and oil filling on the white car. After about 10 minutes we figure the primer is dry enough to overcoat with rattle can black, and 10 minutes later it's time to reassemble the seat cushion and cover. Yes things are still a little sticky, but it has been a long day, and we are somewhat impatient, and no one will see the paint job under the seat anyway. Score one more successful tech day, and several MGB with a clunk removed. Shop facilities, photos and web page courtesy of Barney Gaylord. |

©2011, 2013 Chicagoland MG Club, All rights reserved.