

 The MGA With An Attitude
Body Sill Replacement - RT-612A
B-Post Rear Panel
August 6 and 8, 2013 Chris Griffith in Des Moines, Iowa, USA wrote:
"What I really need is the pattern for the B pillar. Ours is missing the whole bottom section".
"Any way you could trace one of your wood bucks and send it to me"?
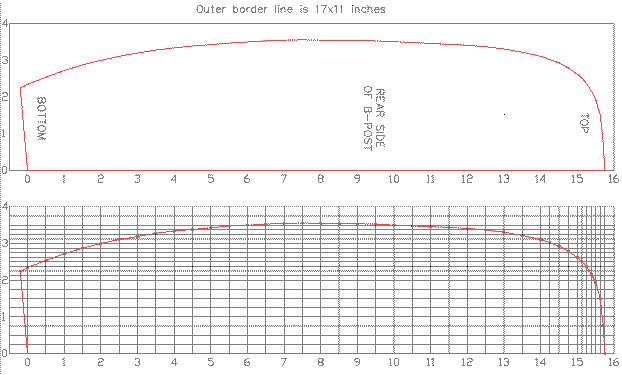
 I found one of my five year old forming blocks for the rear side of the B-post. I placed it on paper, traced around it with a fine point pen, drew a grid on it (with my 45 year old drafting board), measured carefully (I think within 0.01", then transferred the dimensions to a CAD drawing. There is a border line 17x11 inches around the drawing, but it is plotted full scale on 17x11 paper. so the border line did not plot. But if you print it full scale on 17x11 paper (or anything larger) it should come out exactly the right size. This template can be used to cut out the wood forming block. You can double stack boards to make two blocks the same shape for clamping the sheet metal while bending the flanges.

The original cardboard piece was traced from my slightly rusty car before body sill replacement. That pattern was transferred to wood to make the forming block. That wood piece provided the dimensions for this "wood" template. The "wood" template then provided dimensions for a drawing of the formed part, which in turn gave the dimensions for a template for the sheet steel panel in the flat.
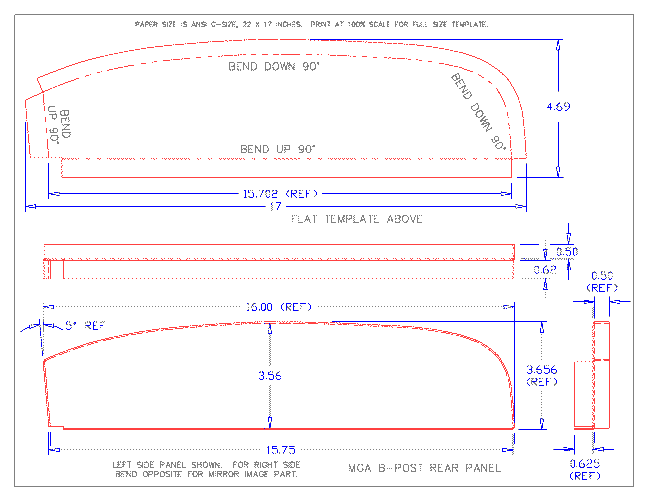
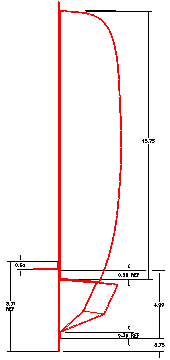
Below is a cutting template for the sheet metal flat piece, and a forming drawing for bending the panel flanges over the wood block. Click on the image for a larger printable pdf file. Using 22 x 17 inch (or larger) paper, print this at 100% scale to get a full size template.

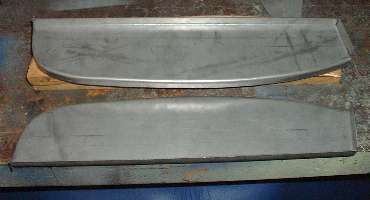
 The sheet metal should be 18 gauge, 0.048" thick, 2-pounds per square foot. Align the steel flat between the two wood blocks with the desired flange width protruding at the sides. clamp it all down securely, and you can hammer form the flanges. I suggest forming the long straight flange first, as it will help to hold the metal in place while forming the more difficult curved flange. The curved flange is formed opposite direction from the straight legs.

I suggest forming the short straight flange on the bottom end last. For this you may need to move one wood block slightly, to form the bottom flange a little farther in, about equal to the thickness of the sheet metal. This is a small adjustment allowing you to get the overall height of the finished panel correct.
|