The MGA With An Attitude
This pattern is compliments of Jay Owen in Castro Valley, California.
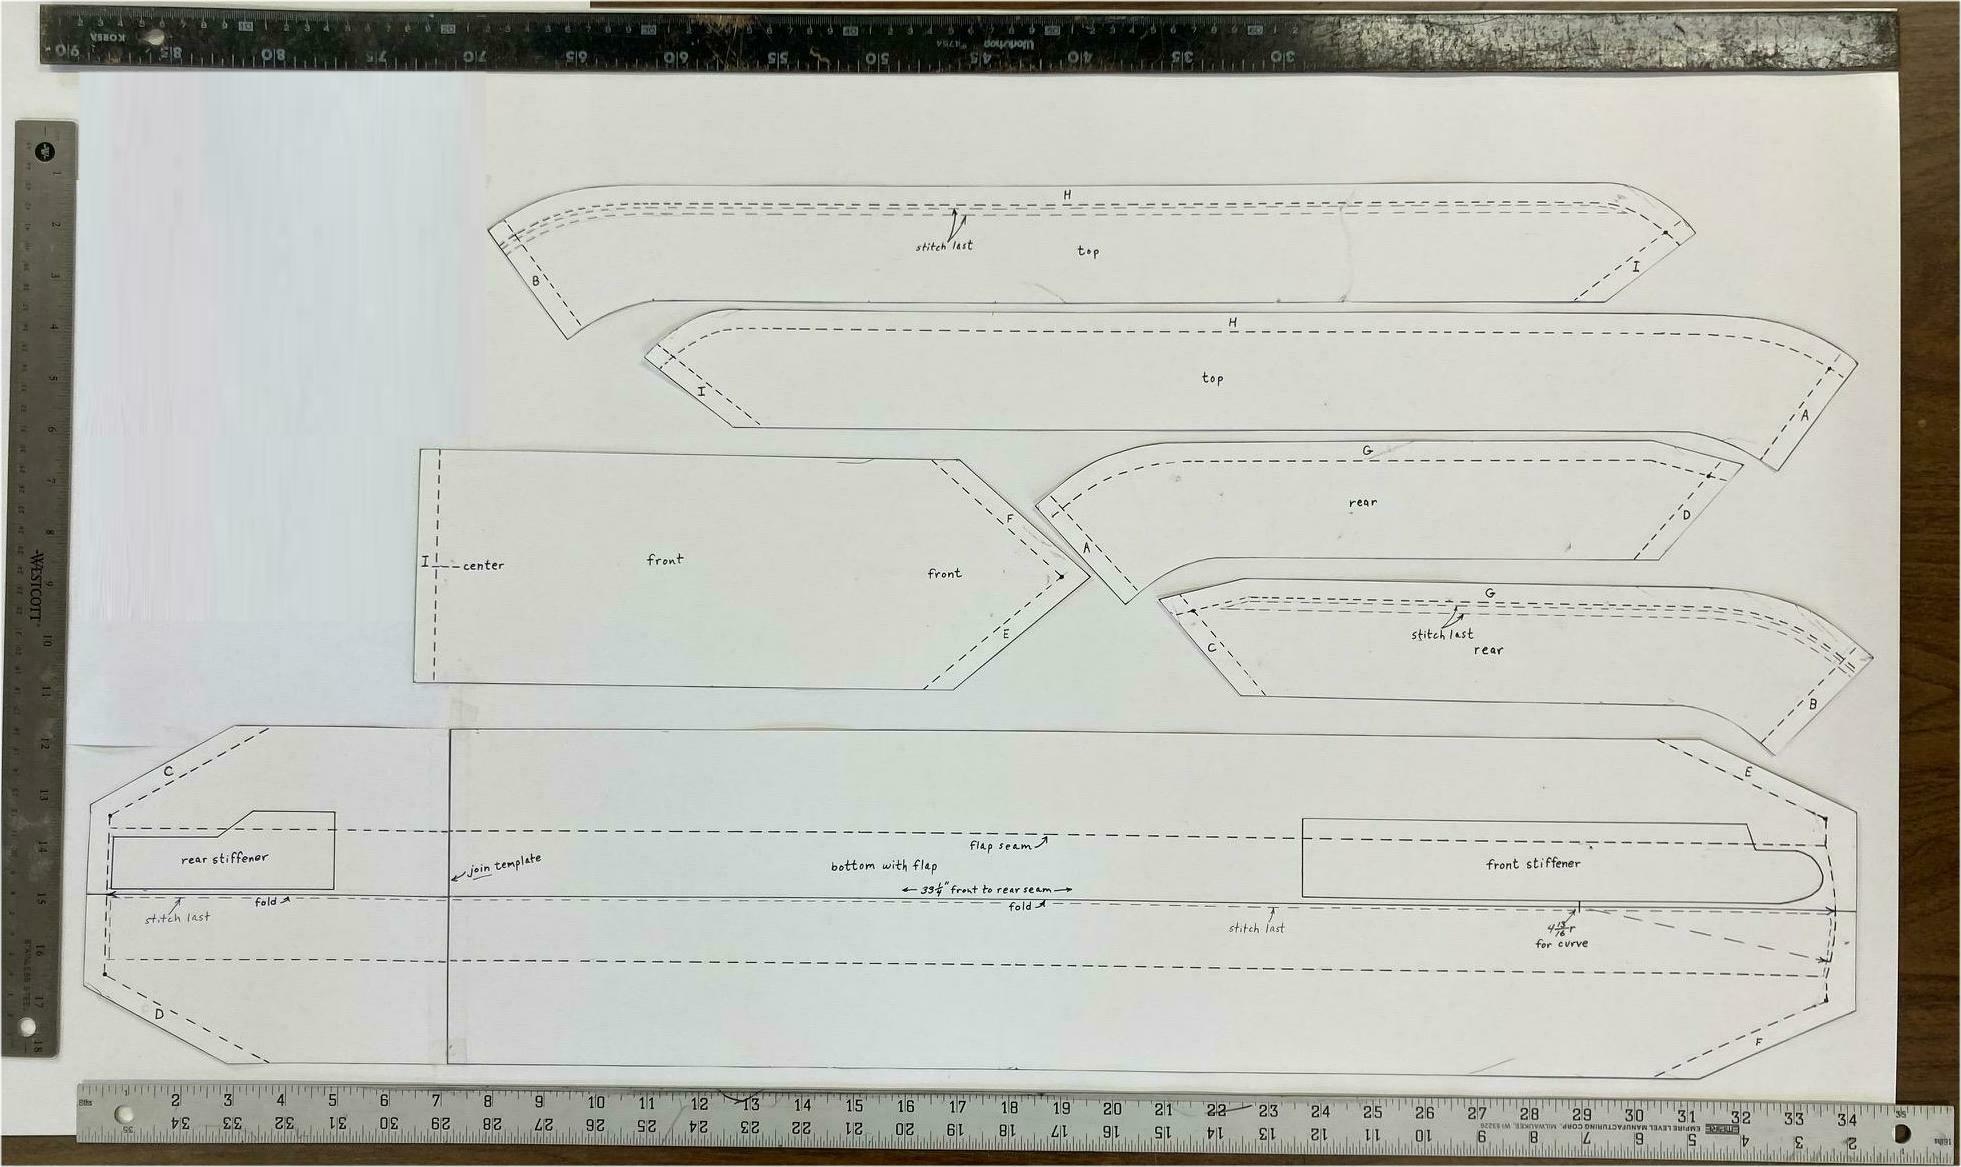
Text instructions for the image above: MGA Side Curtain pattern for vinyl covering First, get an old sample or find the best pictures you can of how the finished side curtains should look. Otherwise the pattern won t make sense. I made some practice runs with cheaper vinyl to get the process down. You will need a good sewing machine with a heavy leather needle and heavy upholstery thread. Also two sided tape and clips help to hold things in place and straight as you sew. The order of assembly follows the order of the lettered seams. Draw the 3/8 inch seam lines on the back of the vinyl pieces to guide the sewing. Assemble all the parts inside out, sewing through the backing with the vinyl surfaces face to face. Sew to the corners and back stitch so it won t unravel. All the 3/8inch seams are done this way. Then trim all 3/8inch seams down to1/16-1/8inch after stitching except for G and H which gets trimmed to 1/4inch to help form the raised ridge across top and rear. 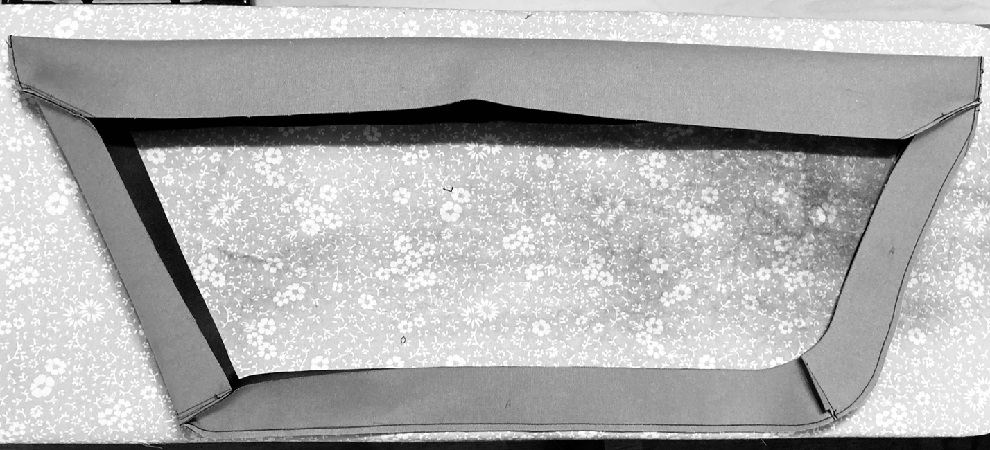 Now turn the cover vinyl side out and use a seam roller to flatten the seams. Insert the two stiffeners and sew the 1-1/4inch flap seam. You will sew through the top part of the stiffeners. Set up an edge guide on the machine to make the seam nice and straight. Trim and fold the A and B seam to minimize the thickness of the raised edge created in this next step. Sew the double row stitch that runs across the top and down the back, widest seam first. Then the narrow stitch around the edge of the bottom flap. An edge guide on the sewing machine is needed here also. 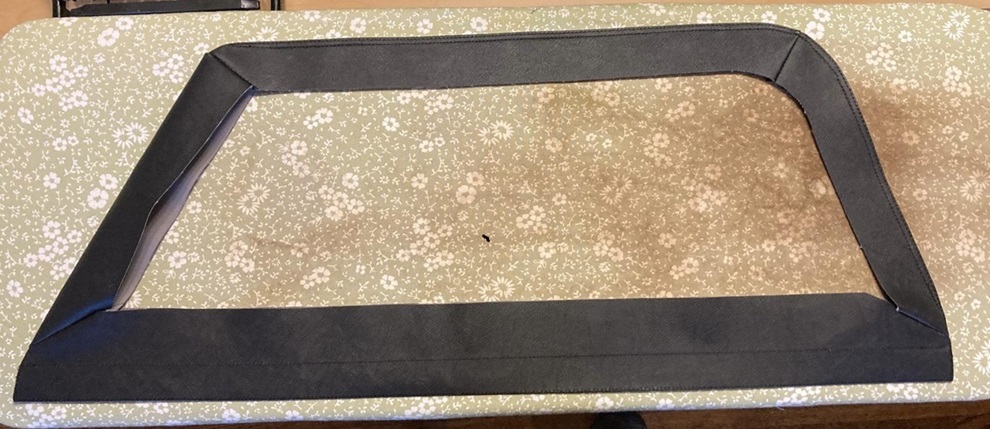 This pattern should fit the frames snugly with plenty of extra to trim and tuck into the frame. Pull and stretch the covers to align the bottom flap to the outside and the top and rear ridge to the inside of the frame. The ridge will cross from the inside to the outside of the frame just before it meets the bottom flap. It helps if the vinyl has some stretch to it. Covering the frame. I used a piece of 3/4" foam backer rod to make the half round pad for the front of the frames. Cut the round in half longways with a razor knife and contact cement to the front of the frames. I fitted and trimmed the new window channel I got from Todd Clarke at this point and set it aside. Using scrap vinyl, cover the stiffener strip in the center of the frame. I used contact cement to adhere it to the painted metal. There should be an extension on each end to continue the strip onto the frame. 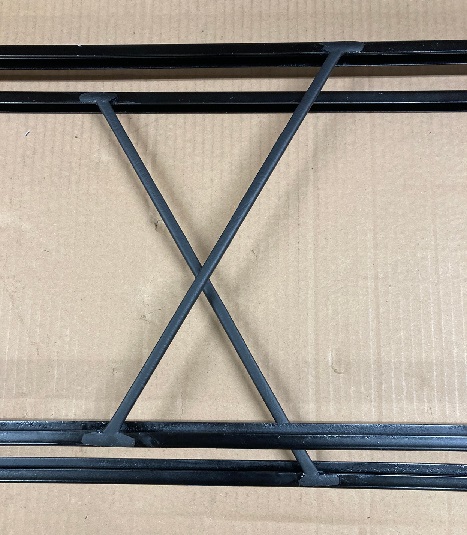 Now fit the new vinyl cover on the frame. Stretch and fit so the flaps and ridges line up to the inside and outside edges as original. I clamped mine on and left them in place to stretch to shape over several weeks. I glued the new covers to the inside of the frames with contact cement. One side at a time. The 3/4 inch foam backer rod also helps here to hold the cover in place as the glue cures. Trim the vinyl inside the channel so the bottom is clear. This is the hardest part. 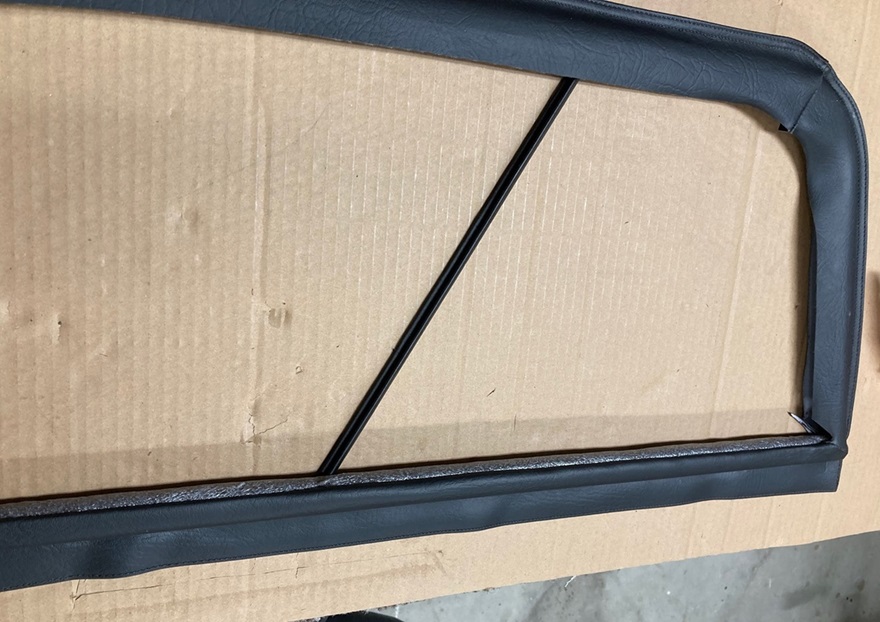 Once the covers are glued onto the frames all the way around. Fit the front window plastic, the felt window channel and the sliding window. Pop rivet the brackets on last and don't forget the copper drain grommet in the lower back corner. 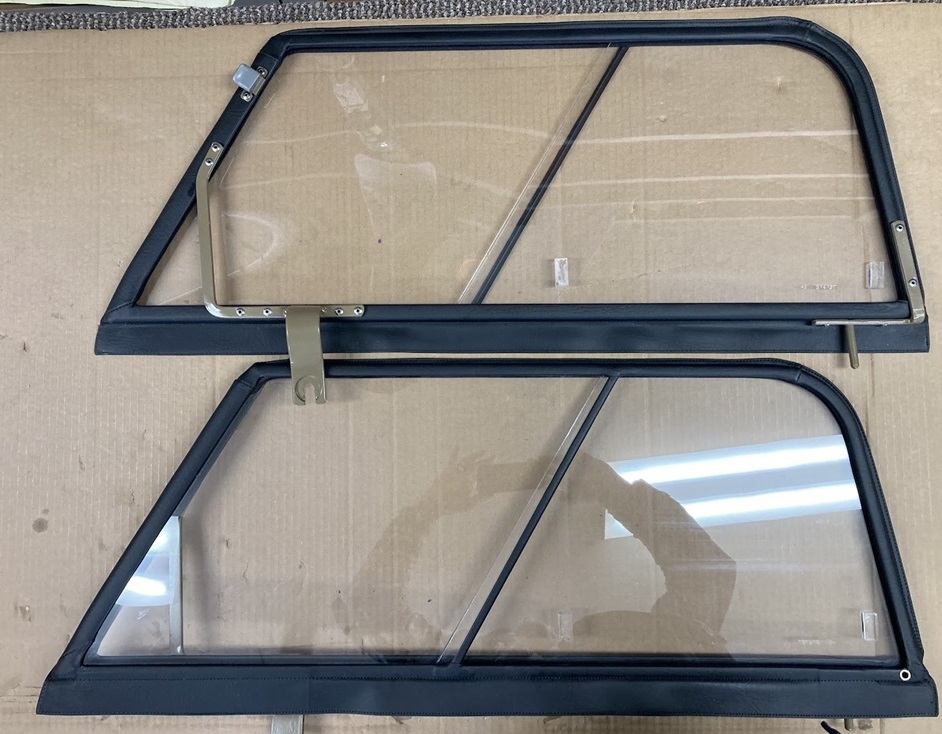 Tech info from Todd Clarke (Clarke Spares And Restorations) shows the side curtain fabric cover as seven separate pieces stitched together.
On 3/11/2025, Jay Owen wrote:
I' sending a scan of a redrawn pattern. .... |