The MGA With An Attitude
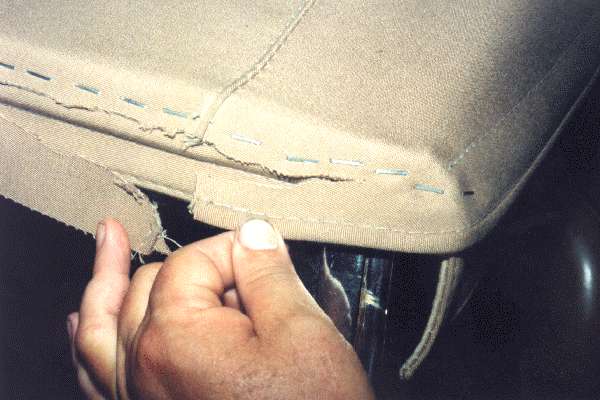
Now you get to trim and fit the edge at the front corner. You will find a hemmed edge on the fabric around the front corner and inward about to the seam in the fabric. Chances are that this edge will be hanging down a little too low over the top of the windshield. Make a vertical cut in the fabric as shown in the picture below, just outside of the seam in the top, and up to a point above the bottom edge of the header rail but still below the line of staples. Then cut along horizontally towards the outside, just below the line of staples, to a point about an inch from the end of the header rail. Also cut off the excess material from the front of the fabric, starting at the seam and going inward, and cutting below the line of staples and at least 1/8 inch above the lower edge of the header rail. Then take the inner end of the hemmed tab and move it higher until the stitching line of the hem is just above the lover edge of the header rail. Staple the hemmed tab to the front of the header rail in that position. Two pages farther on here you will see a good picture of where I have positioned that tab. If you locate it any higher in an attempt to hide the end of the hem, you would end up causing a significant bump in the finishing strip. |

Trimming and fitting the edge at the front corner